How to Draw an Owl Face Step by Step Bird Drawing
How to Draw an Owl Face Step by Step Bird Drawing
How to Draw an Owl Face Easy with this how-to video and step-by-step drawing instructions. Bird drawing tutorial for beginners and everyone. Also, read Lotus Drawing
Step 1 – Draw the Construction Line for the Owl’s Head
Draw some guide/construction lines to help you set up the basic shape and main proportions of the owl’s head. The first thing you want to draw is a vertical line. This line will help you define the midpoint of the drawing area and make sure that both the face/head halves have a relatively uniform width. Next, draw the head’s outer shape, followed by two angled lines that will create the “horns” (a horned owl) and the “eyebrows.” Finally, draw the shape of the face, which is a trio of curves.
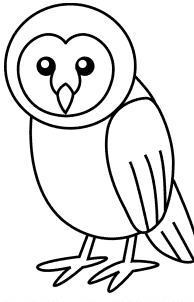
Step 2 – Draw the basic shapes of the head.
Based on the instructions in the previous step, draw different features of the owl’s head and faces such as eyes, beak, “horns,” and other types of the front and the more petite curves of the head contour. Its. Keep in mind that the owl’s eyes are round, but the hair will slightly cover the top of them.
Step 3 – Draw clean lines.
Erase the construction lines, fill the dark areas of the eyes (leave the highlights white) and add some hints about the different feather layers.
Step 4 – Start shading.
Start shading by adding strokes along with the shape of the owl’s head/face. You can use a directional stroke or a slight diagonal stroke if appropriate (in this case, the top of the head). Leave the brighter areas of the hair above the eyes, around the beak, and along with the neck white (for this step).This line will help you define the midpoint of the drawing area and make sure that both the face/head halves have a relatively uniform width. Next, draw the head’s outer shape, followed by two angled lines that will create the “horns” (a horned owl) and the “eyebrows.” Finally, draw the shape of the face, which is a trio of curves.
Step 5 – Refine shadows.
Add some diagonal strokes around the eye area and darken some areas to create individual feathers along the top and bottom of the head. Owls of this type also tend to have a sort of dark outline around the edges of their faces, so it darkens. Draw darker feathers around the neck area (between the two light bristles) using shorter, darker strokes on their base and lighter toward the outer ends.
Step 6 – Complete the drawing.
Complete the shading by adding more overlapping strokes to reinforce the darker areas of the owl. It makes the bristles more defined but doesn’t thoroughly blend the lines. Visible lines will give the owl a feather-like texture, making it look more realistic. In the end, add some lighter strokes (curled in slightly different directions) to the white areas of the owl’s fur to create a sort of “fluff” effect.